Why Is My Candle Tunneling? 7 Common Candle Problems and How to Fix Them
You finally get to light that beautiful candle you’ve been saving. The wick catches, the flame steadies, and then… an hour later you notice a deep, narrow hole forming right down the center. A small pool of melted wax sits surrounded by a tall ring of untouched wax along the edges. Sound familiar?
That frustrating little canyon is called candle tunneling, and it’s easily the most common complaint we hear from candle lovers — especially with container candles. But here’s the good news: nearly every candle problem has an identifiable cause, and most of them are fixable.
In this guide, we’ll walk through 7 common candle problems and exactly how to fix each one:
-
Candle tunneling
-
Wick mushrooming (carbon buildup)
-
Soot and black smoke
-
A flame that’s too small
-
A flame that’s too large or flickering
-
Wet spots, frosting, and other wax appearance issues
-
Weak hot throw (when you can’t smell your candle)
We’ll also include a quick-reference troubleshooting table, a candle care checklist, and a section on when the problem isn’t you — it’s the candle itself.
A quick note before we dive in: proper candle care is a two-way street. It starts with good candle-making practices (the right wick, wax, and fragrance working together) and continues with good burning habits on your end. Both halves matter, and we’ll touch on each throughout.
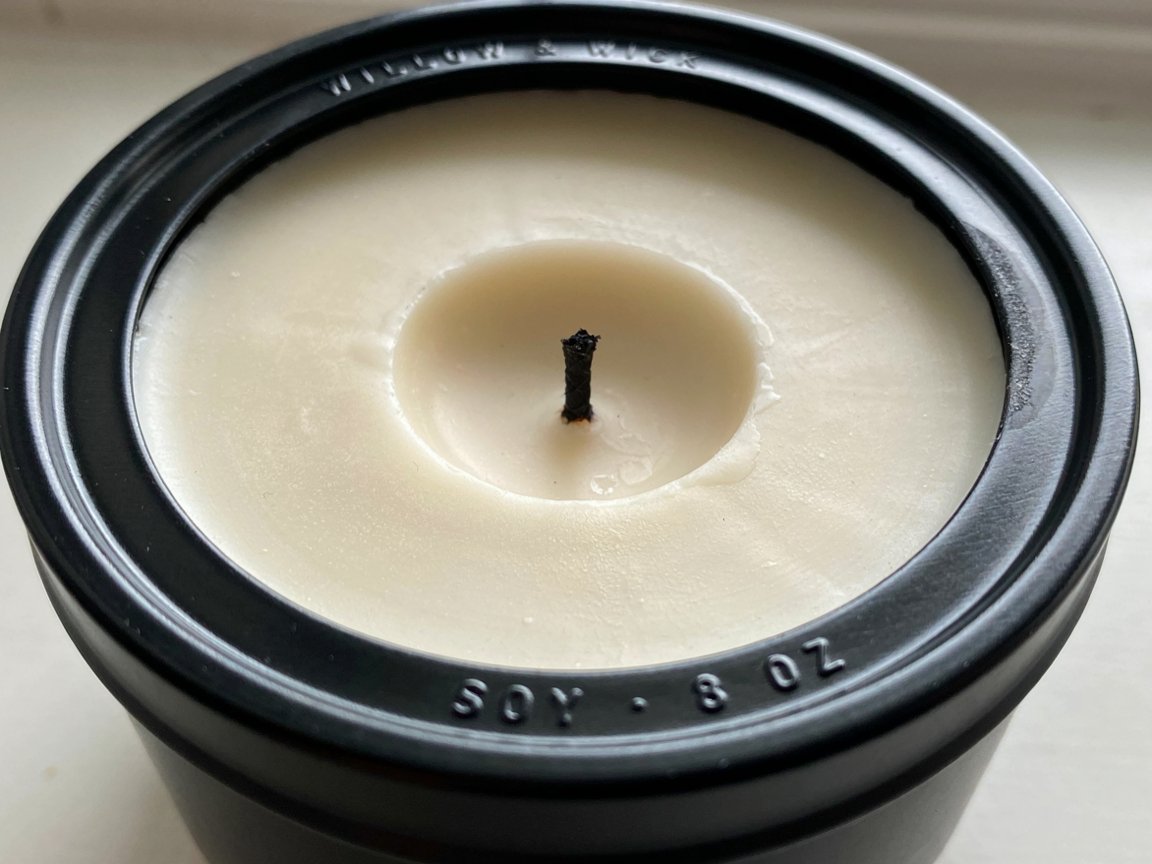
Tunneling is exactly what it sounds like: instead of melting evenly outward to the edges of the container, the candle burns straight down through the center, leaving a tall “wall” of unmelted wax around the wick.
A healthy melt pool, by contrast, should reach fully across the diameter of the container (or very close to it) within a reasonable burn time. For most container candles, that means a melt pool that extends to the edges after roughly 2–4 hours, depending on the candle’s diameter.
Tunneling matters because it wastes both wax and fragrance. When the edges never melt, that wax — and the fragrance oil held in it — never gets used. Over time, a tunneled candle becomes harder to light, burns less efficiently, and can eventually drown the wick as melted wax pools in the deep center channel.
The most common culprits are:
-
The first burn was too short. This is the #1 cause. If you only burn a candle for 30–45 minutes the first time, the wax only melts in a small circle around the wick. That narrow channel then becomes the “memory” the candle follows on every future burn.
-
The wick is too small for the container diameter, wax type, or fragrance combination. A too-small wick simply can’t generate enough heat to melt wax all the way to the edges.
-
The candle was extinguished too early during initial burns, before a full melt pool could form.
-
Repeated short burns reinforce a narrow melt pattern that’s hard to break out of.
If your candle has already started tunneling, you can sometimes correct it — but you have to be patient and safe about it:
-
Let the candle burn long enough to reach a fuller melt pool. Light it and allow it to burn until the melted wax extends close to the container walls. For a typical 3-inch container, that’s often 2–3 hours.
-
Stay within safe burn limits. Don’t just let a candle burn for 6+ hours trying to “fix” it. Most candles shouldn’t be burned longer than about 4 hours at a time. Burning too long overheats the container, stresses the wick, and creates soot.
-
If the wax walls are very tall, you can carefully remove a small amount of solid wax from around the rim (only when the candle is completely cool) to help the flame catch up — but don’t overdo it.
-
Know when it’s a design problem. If you’ve given the candle a proper, full melt pool burn and it still tunnels every time, the wick is simply too small for that container. That’s a candle-making flaw the customer can’t fix — the maker needs a larger wick.
The first burn is the most important burn of a candle’s life. Burn it long enough on the first light — and ideally the first two or three lights — for the melt pool to reach the edges. This “sets” the candle’s burn memory and prevents tunneling down the road.
2. Mushrooming or Excessive Carbon Buildup on the Wick
After burning a candle for a while, you might notice a dark, rounded, bulbous shape forming on the tip of the wick — almost like a little mushroom. That’s carbon buildup, and while a tiny bit is normal, a large or excessive mushroom is a sign something’s off.
Mushrooming happens when the wick consumes more wax (and the additives in it, including fragrance) than it can fully burn off cleanly. The excess carbon deposits on the tip instead of being released.
-
The wick is too large for the candle, drawing up more fuel than it can combust cleanly.
-
Long burn times — the longer a candle burns in one session, the more carbon tends to accumulate.
-
Certain fragrance oils produce more soot and carbon than others, especially heavier or sweeter scents.
-
Not trimming the wick between burns, so carbon keeps building on top of old carbon.
-
Extinguish the candle and let it cool completely. Never try to trim a hot wick.
-
Trim the wick to about 1/4 inch (6mm) before the next burn.
-
Use a wick trimmer for a clean, even cut, though nail clippers or scissors work in a pinch.
-
If the mushroom is severe and returns after every single burn, the wick is likely too large for that wax/fragrance combo — a maker-side issue.
Keep the wick trimmed to roughly 1/4 inch before every burn. A properly trimmed wick burns cleaner, produces less soot, and helps your candle last longer.
A little wisp of smoke when you blow out a candle is normal. But a candle that’s actively producing black smoke while burning — or leaving heavy black soot on the container walls — is telling you something’s wrong.
Common causes:
-
The wick is too long. A long wick draws too much wax and can’t burn it all off cleanly.
-
The wick is too large for the container.
-
Drafts. Air movement disturbs the flame, causing incomplete combustion and soot.
-
Excessive fragrance or formulation issues — too much fragrance oil can cause a candle to smoke.
-
Burning the candle for too long in a single session.
-
Extinguish the candle right away.
-
Let it cool completely.
-
Trim the wick to 1/4 inch.
-
Move the candle away from fans, vents, open windows, air conditioners, and high-traffic doorways.
-
Clean excessive soot from the container once it’s cool — a dry paper towel or damp cloth with a bit of rubbing alcohol works well.
If your candle consistently produces heavy black soot no matter what you do — trimmed wick, no drafts, reasonable burn times — that’s usually a sign of a candle design or formulation problem, not something you’re doing wrong. It may have an oversized wick or an over-loaded fragrance blend. At that point, it’s best to stop using that candle.
What Does a Weak Flame Look Like?
A weak flame is a small, low flame that struggles to create a meaningful melt pool. The candle seems to burn very slowly, the flame may sputter or nearly drown in wax, and little to no fragrance is released.
-
The wick is too small for the container diameter.
-
The wick is drowning in a pool of melted wax it can’t keep up with.
-
Fragrance load is affecting the wick — heavy fragrance oil can clog a wick’s ability to draw wax.
-
Wax buildup around the wick base from a previous tunneled burn.
-
The wick was trimmed too short, so it can’t reach the wax or generate enough heat.
-
Check the wick length. If it was trimmed down to a tiny nub, let the candle burn — the flame may grow as the wax around it melts.
-
Remove excess wax from around the wick only when the candle is completely cool and only a small amount. Be gentle and never dig into the candle.
-
Pour off a little pooled wax if the wick is genuinely drowning — but again, only when safe and only a small amount.
-
If the problem persists across multiple burns, the candle likely has a wick-selection issue that can’t be solved from the consumer side.
This is exactly why wick testing is essential during candle development. The right wick size depends on the wax type, fragrance load, container diameter, and even the melt point of the wax — there’s no one-size-fits-all, which is why thorough testing matters before a candle ever reaches a customer.
5. Flame Is Too Large or Flickering Excessively
What Causes a Large or Flickering Flame?
A flame that’s too tall, dancing wildly, or flickering constantly isn’t just annoying — it can be a safety concern.
Common causes:
-
The wick is too long and needs trimming.
-
A drafty location is disturbing the flame.
-
The wick is too large for the candle.
-
Carbon buildup (mushrooming) on the wick tip.
-
The candle has been burning too long, overheating the wax pool.
-
Extinguish the candle if the flame becomes excessively large or erratic — don’t try to fix it while it’s still lit.
-
Allow it to cool completely.
-
Trim the wick to 1/4 inch.
-
Relocate the candle away from drafts, vents, and windows.
-
Never leave an unusually large or unstable flame unattended — when in doubt, blow it out.
A flame should be steady and roughly 1–2 inches tall. If yours is dancing wildly, producing smoke, reaching over 2 inches, or feels hot enough to make the container uncomfortable to touch, extinguish it immediately — don’t try to “fix it while burning.” Some problems require the candle to be out and cool before they can be addressed.
6. Wet Spots, Frosting, or Other Wax Appearance Problems
This section is one of our favorites, because so many new candle customers see these marks and assume their candle is defective. Let’s clear that up.
“Wet spots” aren’t actually wet — they’re areas where the wax has pulled away slightly from the glass container, creating a patch that looks darker or slightly shadowed. The glass shows through more in those spots, making it look like a wet or oily patch.
They’re a result of wax contracting as it cools and slightly separating from the container wall.
If you’ve ever bought a soy candle and noticed a cloudy, white, frosted, or crystalline appearance on the surface or sides of the wax — that’s frosting. It’s extremely common in natural soy wax and is a sign you’re working with a natural, plant-based wax rather than a heavily processed paraffin blend.
Frosting is purely cosmetic. It has no effect on how the candle burns or how strongly it throws fragrance.
-
Temperature changes during cooling.
-
Cooling rate — cooling too fast or unevenly.
-
Container temperature at the time of pouring.
-
Wax characteristics — soy wax naturally contracts and frosts more than paraffin.
-
Adhesion between the wax and the glass container.
For candle makers, yes — mostly. Steps include:
-
Preheating containers before pouring so the wax adheres better.
-
Controlling pouring temperatures carefully.
-
Managing cooling conditions — cooling slowly and evenly at room temperature, away from drafts.
-
Avoiding temperature extremes during storage and shipping.
Some wet spots and frosting, especially with 100% soy wax, are simply part of working with a natural product and can’t be fully eliminated.
A candle can look imperfect and still burn perfectly. Frosting and wet spots are cosmetic — they don’t mean your candle is broken, defective, or low quality. In fact, with soy candles, they often indicate a natural wax blend.
7. Candle Doesn’t Have a Strong Hot Throw
A quick primer on the two types of scent:
-
Cold throw is the fragrance you smell when the candle is unlit — the scent right out of the jar.
-
Hot throw is the fragrance released while the candle is burning — the scent that fills the room once the melt pool forms.
Hot throw is what most people actually mean when they ask, “Why can’t I smell my candle?”
Why Is My Candle’s Hot Throw Weak?
Possible causes:
-
The wick isn’t creating a large enough melt pool, so not enough fragrance is being released.
-
The candle hasn’t cured long enough. Fragrance oil needs time to fully bind with the wax — most candles need at least 3–7 days of cure time, and some benefit from 1–2 weeks.
-
The fragrance load isn’t appropriate — too little, or sometimes even too much, can weaken throw.
-
Fragrance oil characteristics — some scents are naturally lighter or more subtle.
-
Wax/fragrance compatibility — not every fragrance works well in every wax.
-
Room size — a candle sized for a bathroom won’t fill a large open-concept living room.
-
Air circulation — open doors, vents, and fans disperse the scent.
-
The candle hasn’t been burned long enough to develop a full melt pool.
For candle makers:
-
Test different wick sizes and types until you find the right melt pool.
-
Test fragrance percentages — more isn’t always better.
-
Allow appropriate cure time before evaluating throw.
-
Test different fragrance and wax combinations for compatibility.
For customers:
-
Use the candle in an appropriately sized room — a single container candle won’t scent a whole house.
-
Follow recommended burn practices — burn long enough for a full melt pool (2–4 hours).
-
Don’t assume “more fragrance oil” automatically means stronger fragrance. Over-loading a candle can actually cause wick clogging, sooting, and weaker throw, not stronger.
Bonus Section: How to Tell If Your Candle Is Burning Correctly
Not sure if your candle is healthy? Here’s a quick checklist. A good, properly burning candle generally has:
-
[ ] A stable flame — steady, not wildly dancing
-
[ ] Reasonable flame height — roughly 1–2 inches
-
[ ] Minimal soot — little to no black smoke while burning
-
[ ] A controlled melt pool that reaches toward the edges
-
[ ] A properly trimmed wick at about 1/4 inch
-
[ ] No excessive smoking
-
[ ] No extreme container heat — the jar should be warm, not too hot to touch
-
[ ] Consistent fragrance release while burning
If you can check most of these boxes, your candle is doing exactly what it should. This checklist makes a great shareable graphic for Pinterest and Instagram — save it for reference next time you light a candle.
Candle Troubleshooting Quick Reference
|
Problem |
Likely Cause |
What to Do |
|
Tunneling |
Short first burns / undersized wick |
Allow adequate melt pool; evaluate wick size |
|
Mushrooming |
Long wick / carbon buildup |
Trim wick to 1/4 inch before each burn |
|
Black smoke |
Long wick / drafts / oversized wick |
Trim wick, remove from drafts |
|
Tiny flame |
Undersized wick / wick drowning |
Check wick length and wax buildup |
|
Huge flame |
Oversized or too-long wick |
Extinguish, cool, and trim |
|
Wet spots |
Cooling and adhesion |
Usually cosmetic — no action needed |
|
Weak hot throw |
Wick, cure time, fragrance, room size |
Evaluate burn habits and formulation |
Candle Care Tips for Customers
A few simple habits prevent most of the problems in this article. Here’s a straightforward candle care routine:
-
Trim the wick to about 1/4 inch.
-
Place the candle on a stable, heat-resistant surface.
-
Keep away from drafts, vents, and flammable objects.
-
Never leave a burning candle unattended.
-
Don’t burn for excessively long periods — aim for 2–4 hours at a time.
-
Keep away from children and pets.
-
Keep the wax pool free of debris, matches, and wick trimmings.
-
Extinguish safely — use a snuffer or dip the wick rather than blowing it out (blowing can cause splattering and smoke).
-
Allow the candle to cool completely before moving it.
-
Trim the wick before the next burn.

When the Problem Is the Candle — Not You
Here’s an honest truth that builds trust: sometimes the problem isn’t your burn habits at all. A well-meaning candle lover can do everything right — trim the wick, avoid drafts, burn for the right amount of time — and still end up with a tunneling, sooting, weak-throwing candle.
When that happens, the issue is almost always in how the candle was made. A responsible candle maker tests and fine-tunes:
-
Wick size and wick type for the container diameter
-
Wax type and how it performs
-
Fragrance oil choice and its characteristics
-
Fragrance percentage — getting the load right
-
Container diameter — wider containers need larger wicks
-
Pour temperature — affects adhesion and appearance
-
Cure time — letting fragrance bind to the wax
-
Overall burn performance — flame height, melt pool, soot, and throw
This testing process is why two candles that look identical can perform completely differently. It’s also why we at North Ember put every blend through real-world burn testing before it ever reaches you.
You don’t need to become a candle chemist to enjoy candles — but knowing that these factors exist helps you tell the difference between “I burned this wrong” and “this candle just wasn’t made right.”
Tunneling happens when the candle burns down the center instead of melting outward to the edges. It’s almost always caused by the first burn being too short, or by a wick that’s too small for the container.
Can I fix a candle that has already tunneled?
Sometimes. Burn it long enough (within safe limits) to let the melt pool reach the edges again. If the walls are too tall, carefully remove a small amount of cool wax from the rim. If it tunnels every time even with proper burns, the wick is too small and it can’t be fixed from your end.
How long should I burn my candle?
Long enough to form a full melt pool across the container — usually 2–4 hours — but never more than about 4 hours at a time.
How often should I trim my candle wick?
Before every burn. Keep it to about 1/4 inch.
Why does my candle produce black smoke?
Usually a wick that’s too long, a drafty location, or a wick that’s too large. Trim the wick and move it away from drafts. If it persists, the candle may be over-wicked.
Why is my candle flame so small?
The wick may be too short, too small for the container, or drowning in wax. Check the wick length and clear any excess wax around it. If it stays small, the wick is likely undersized.
Why is my candle flame so large?
A wick that’s too long or too large, or a candle that’s been burning too long. Extinguish, cool, trim, and move away from drafts.
Why does my soy candle have white spots?
That’s frosting — a natural, cosmetic characteristic of soy wax. It doesn’t affect the burn or the fragrance at all.
Are wet spots on a candle normal?
Yes. Wet spots are areas where wax has pulled slightly from the glass as it cooled. They’re cosmetic and don’t affect performance.
Why can’t I smell my candle when it’s burning?
Likely causes: the wick isn’t creating a full melt pool, the candle hasn’t cured long enough, the room is too large, or the fragrance load or wax/fragrance combo isn’t ideal. Burn it in a smaller, enclosed space and give it a full melt pool before judging the throw.
Does a higher fragrance load mean a stronger candle?
Not necessarily. Too much fragrance oil can actually clog the wick, cause soot, and reduce throw. The right load, properly cured, is what creates a strong, clean scent.
Let’s recap the three big takeaways:
-
Most candle problems have an identifiable cause. Tunneling, soot, weak throw, tiny flames — they all trace back to specific, fixable reasons.
-
Proper candle care prevents many common issues. Trimming your wick, avoiding drafts, and burning long enough (but not too long) solves a surprising number of problems before they start.
-
Good candle makers test extensively before selling. When a candle performs poorly despite perfect care, it’s usually a wick, wax, or formulation issue — which is exactly why rigorous testing matters.
A great candle is part craft, part chemistry, and part care. Treat yours well, and it’ll fill your space with warmth and fragrance exactly the way it should.
Enjoying your candle? Browse the North Ember Candle Co. collection and find your next favorite scent.